Managing email addresses
With the new server generation, e-mail management and handling have also changed somewhat. There is no new distinction between mailbox and account. You create an e-mail address that is also an e-mail account.
To manage now the e-mail addresses/accounts, proceed as follows:
2. Navigate
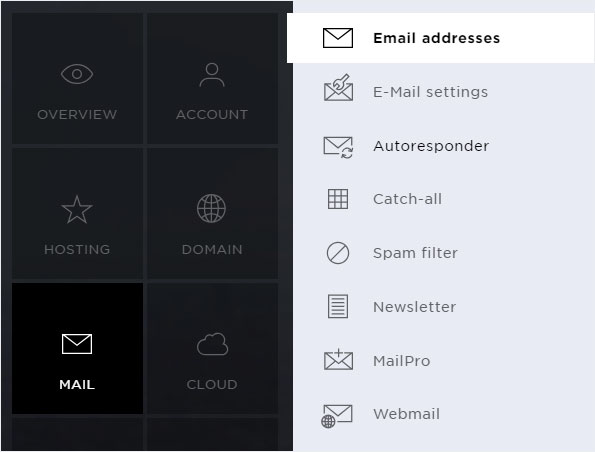
Click on the menu item Mail. You will automatically be redirected to the submenu item Email adressen.
3. Administration
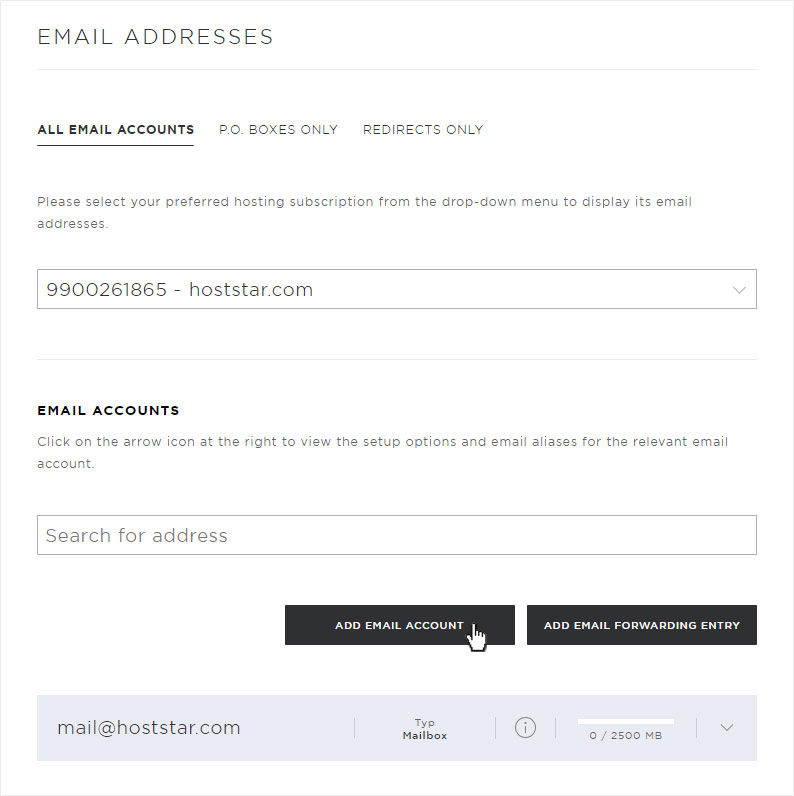
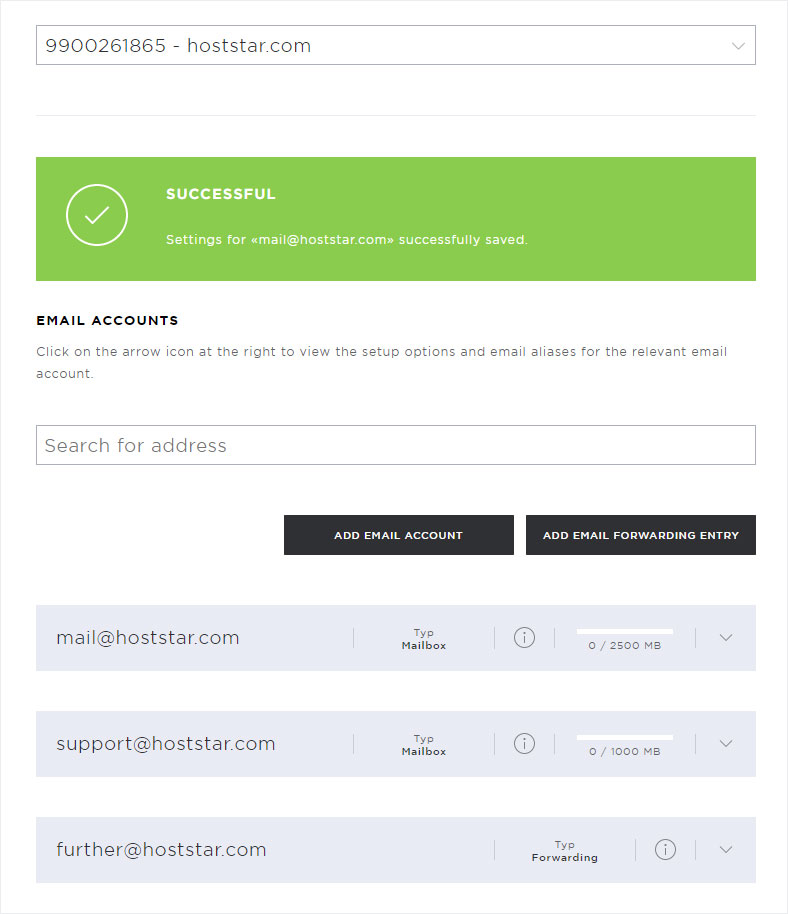
On the overview page that now appears, select the desired domain at the top. The following adjustments/settings are then available:
• Add email address/account
• Add email forwarding entry
• Edit e-mail address/account (change password / adjust mailbox size)
• Manage email aliases
• Redirects
• Remove email address/account

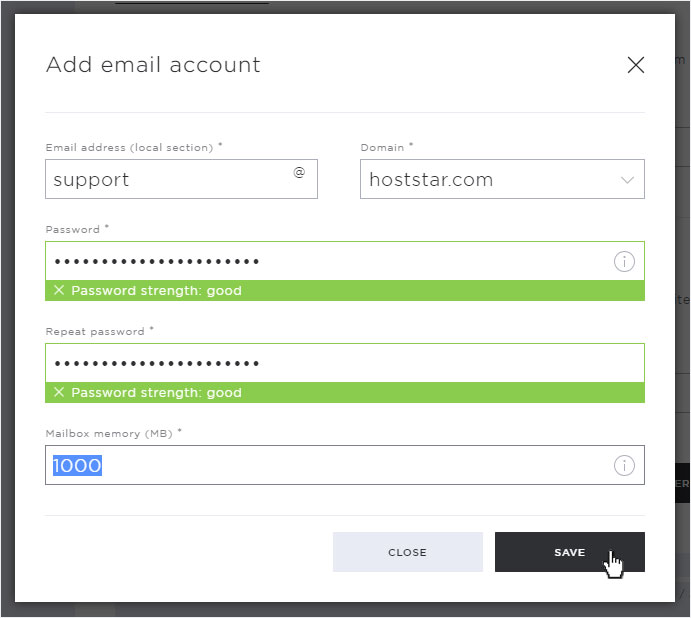
4. Add email address
To add a new, independent e-mail address (account), click on the Add email account button.
Please enter the following data in the popup that now opens:
• Email address (local section): here e.g. support
• Domain: here e.g. hoststar.com
• Password: min. 8 characters, including min. 1 capital & 1 small letter, 1 special character and 1 digit
• Mailbox storage space: freely definable, max. 10,000 MB
Then click on the Save button to create the email address.
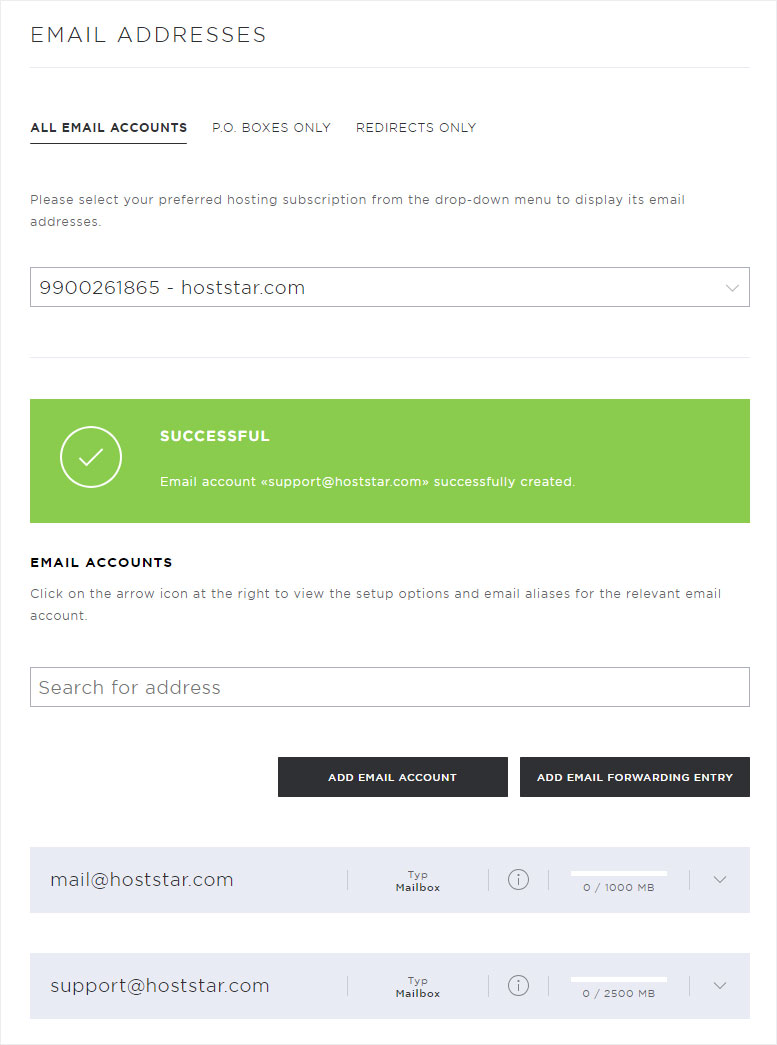
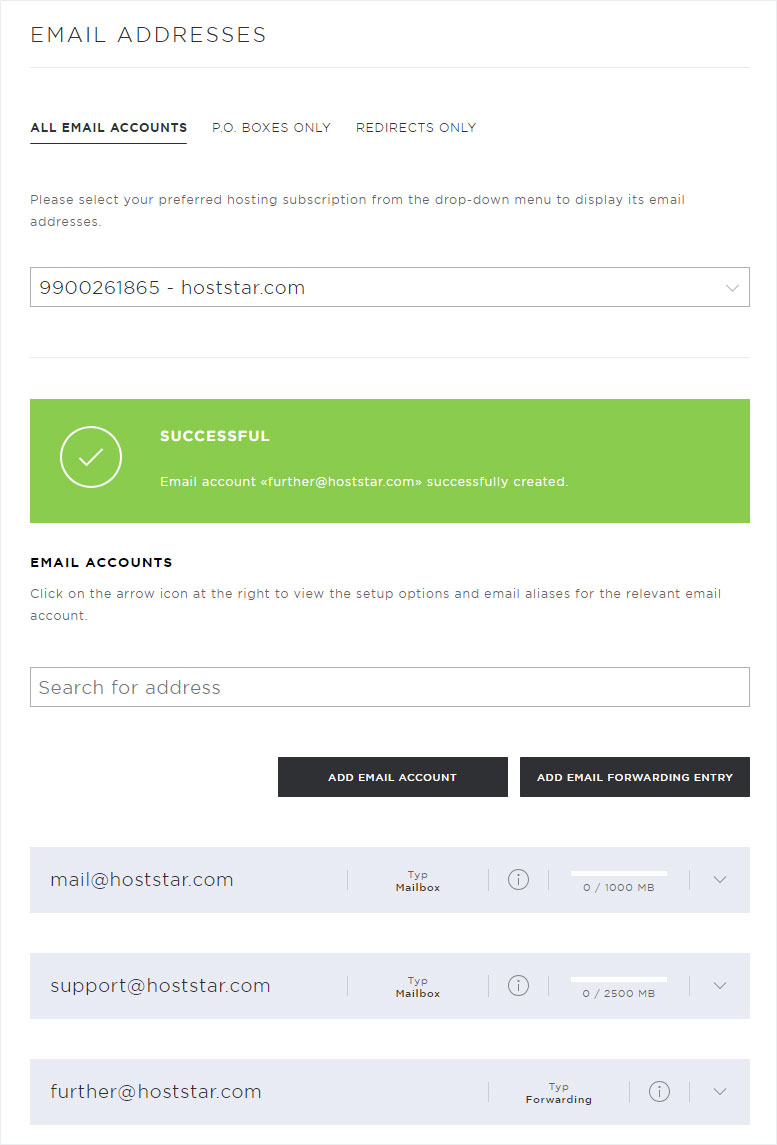
The email address (account) will be created immediately and displayed on the overview page with a green success message, as well as under e-mail accounts.
5. Add email forwarding
To create an external or internal forwarding, click on the button Add email forwarding entry.
Please note that you are entering pure email forwarding here, with this no emails are stored, but only forwarded to the destination addresses.
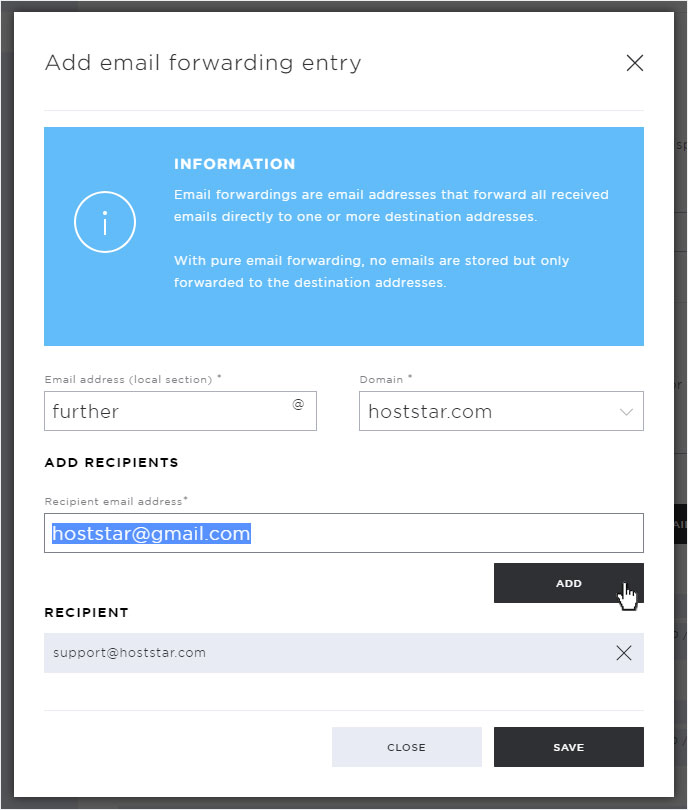
In the popup that now opens, you can enter the e-mail forwarding. First define the Email address (local section) (here e.g. further). Then select the desired or required domain under Domain.
Under Add recipient you can enter an internal, existing e-mail address (here e.g. support@hoststar.com). Then click on the Add button.
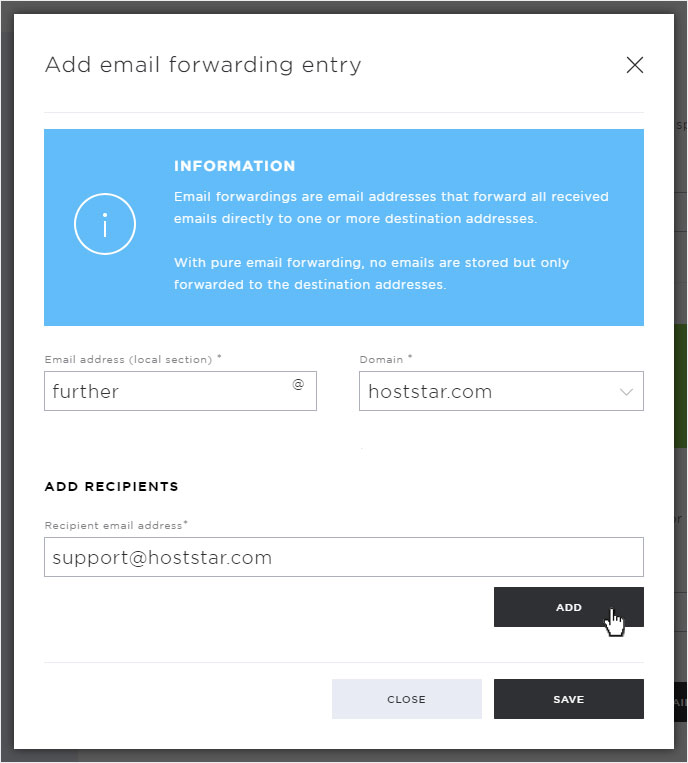
The desired recipient will be added immediately and displayed in the new Recipient area.
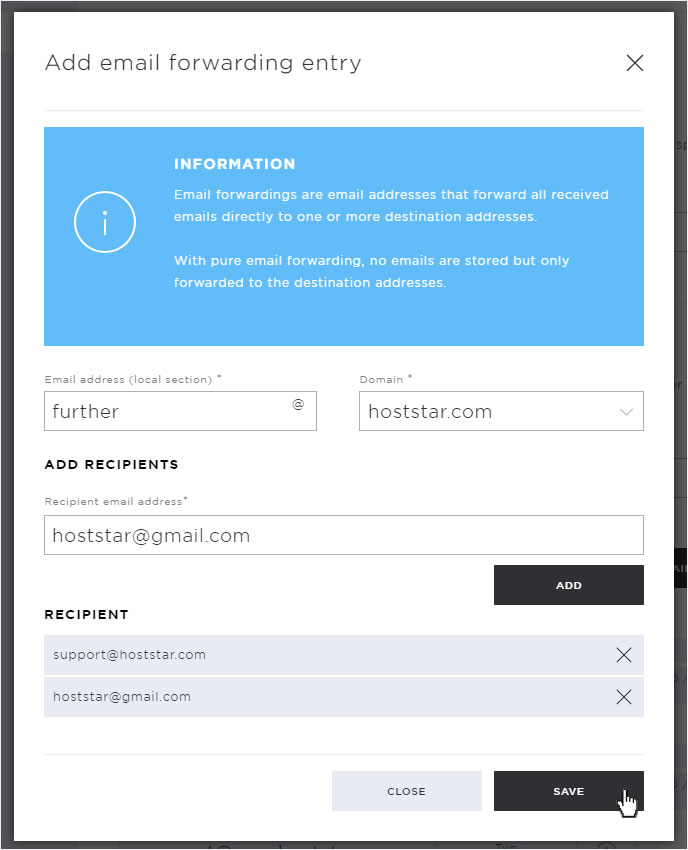
You can now enter further recipient addresses, of course also external. Enter the desired e-mail address and click on the Add button again.
The desired external recipient is also added immediately and displayed under Recipient.
Once all email addresses (recipients) have been entered, click on the Save button.
The Forwarding is created immediately and indicated to you by a green success message. A Forwarding account is also added under Email accounts. From now on, all incoming emails will be forwarded directly to the registered recipients.
If you would like to create a forwarding with a copy remaining on your email account and a secondary address receiving a so-called copy, create a Forwarding as described under Item 8.
6. Edit email address
To edit an e-mail address that has already been entered, i.e. to enter a new password or to adjust the mailbox size, click on the drop-down arrow next to the desired e-mail address and then on the Edit button.
Here you can now change your password, do not forget to repeat the password and then click on the Save button.
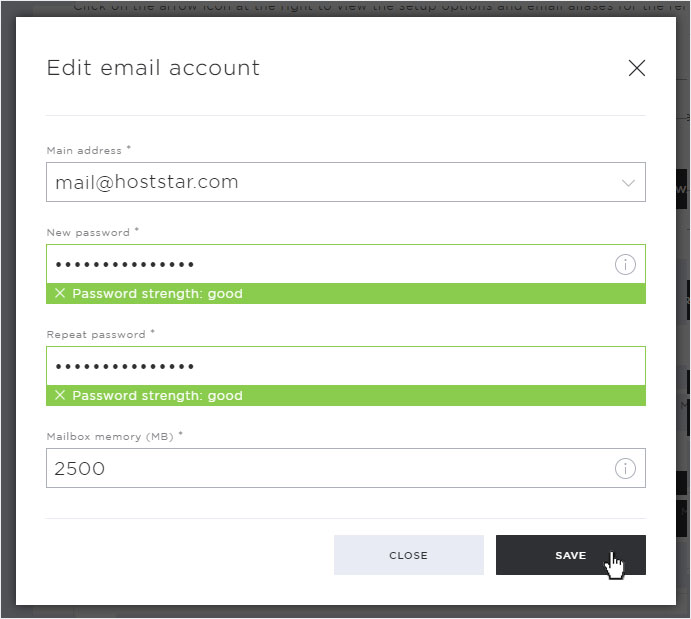
You can also adjust the mailbox size directly here. Please note the maximum size of 10'000MB.
Then click on the Save button to save your changes.
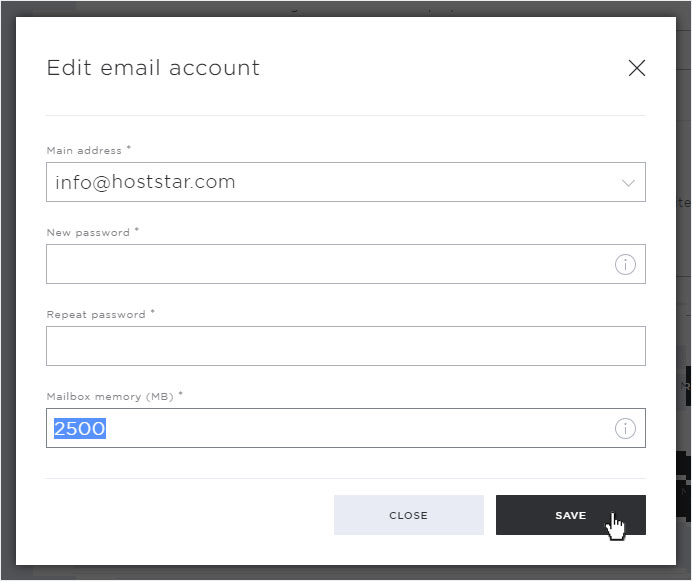
The new password will be saved immediately. This is indicated by the green success message.
Please note that you must also change the password in your email program for the corresponding account so that you can continue to access the email account.
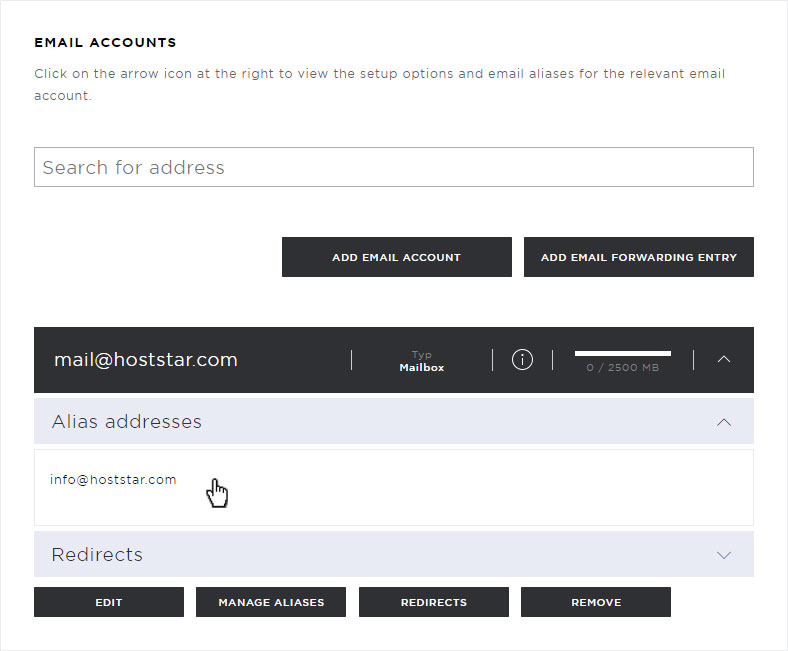
7. Manage email aliases
An email alias is a forwarding e-mail address. To the outside, an alias appears like a regular email address, but it forwards incoming messages on the server directly to another email address.
If you don't want to create your own account for this e-mail address, enter (here e.g. info@hoststar.com) as an alias, which will be redirected directly to mail@hoststar.com.
To enter an email alias, click on the drop-down arrow at the desired e-mail address and then on the Manage aliases button.

In the popup that now opens, you can enter the e-mail aliases. First define the Email address (local section) (here e.g. info). Then select the desired or required domain under Domain. Then click on the Add button.
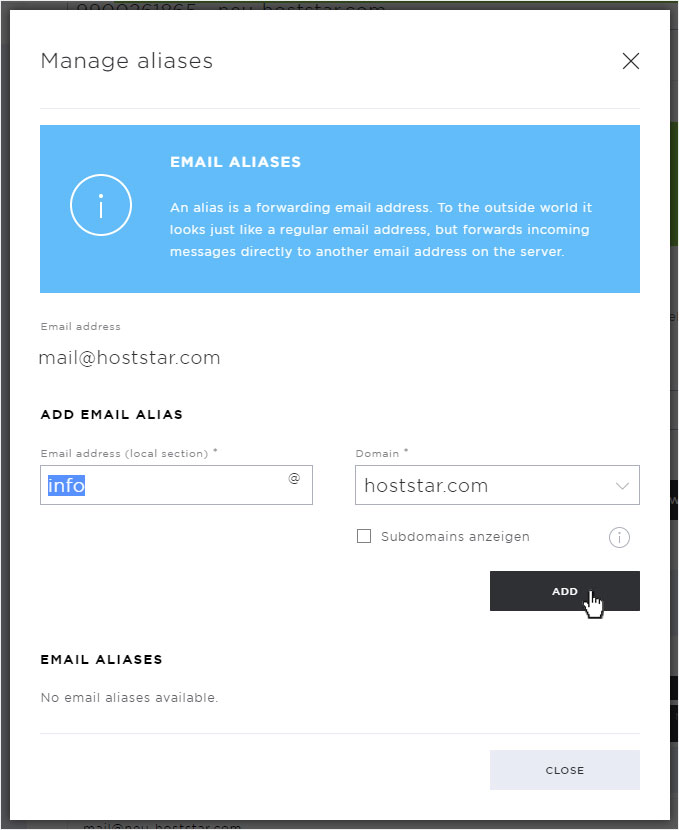
The alias address is immediately added to the Email aliases section. To save the entry, click on the Close button.
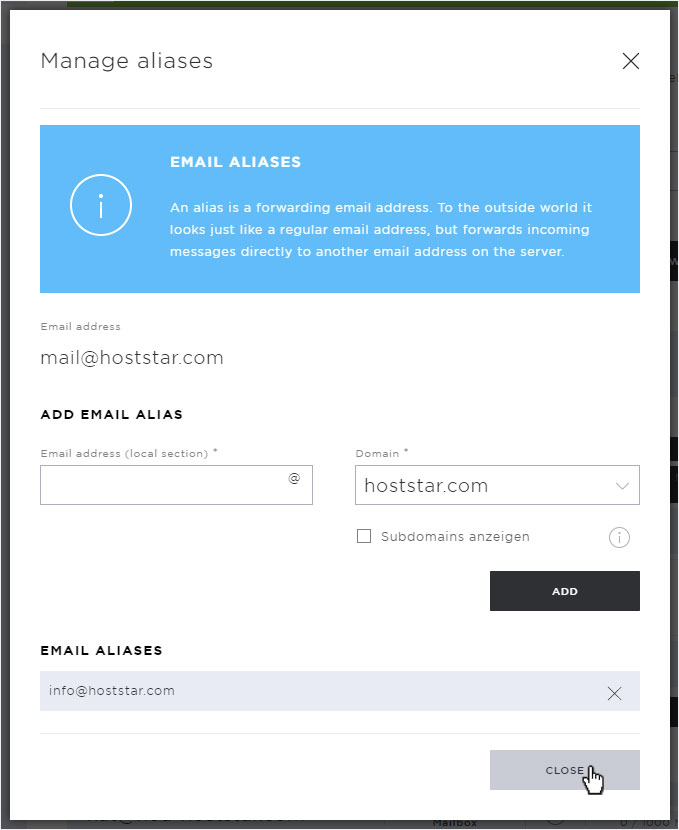
The alias address is saved immediately. It will be displayed in the Alias addresses section. You can also edit it at any time by clicking on the Manage aliases button.
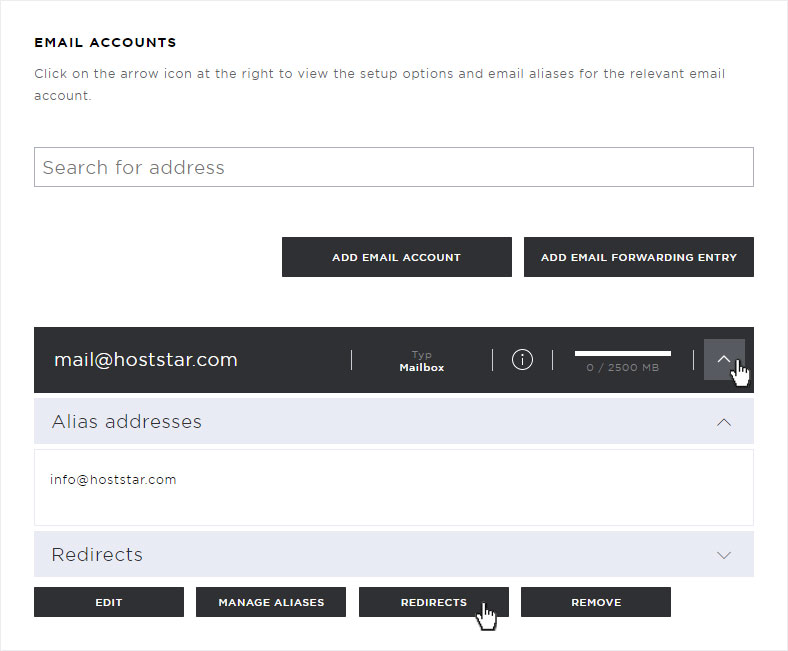
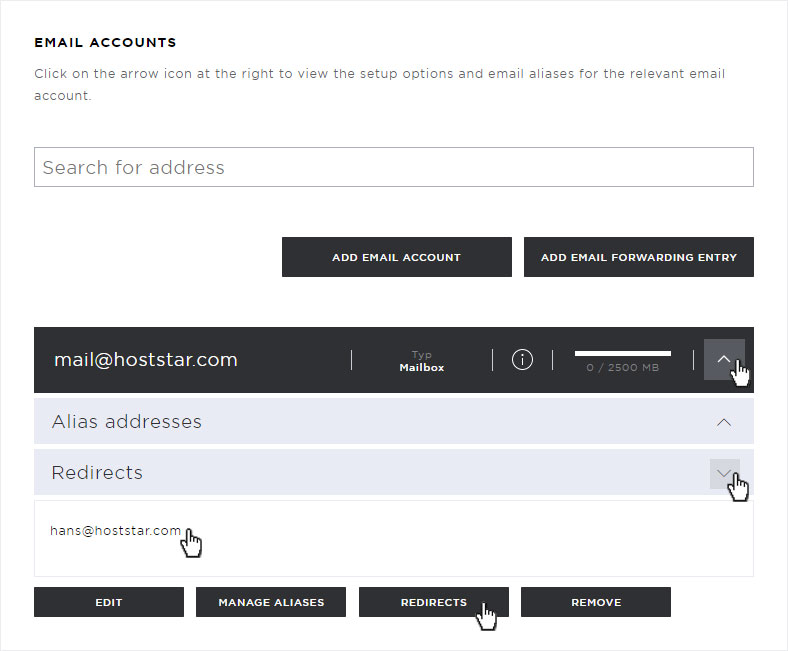
8. Redirects
If you would like a copy of each email to be sent or forwarded to a second person or to another e-mail address during your holidays, for example, set up a forwarding here.
To do this, click on the Redirects button.
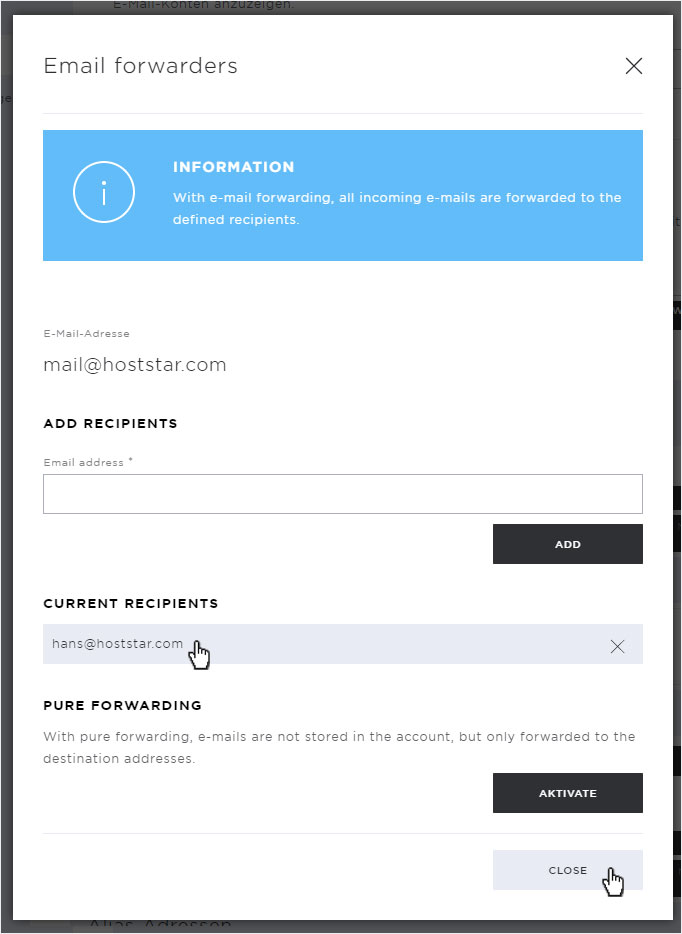
In the popup that opens, you can now add the recipient who should now receive a copy of your emails (here, for example, hans@hoststar.com). Enter the desired e-mail address and then click on the Add button.
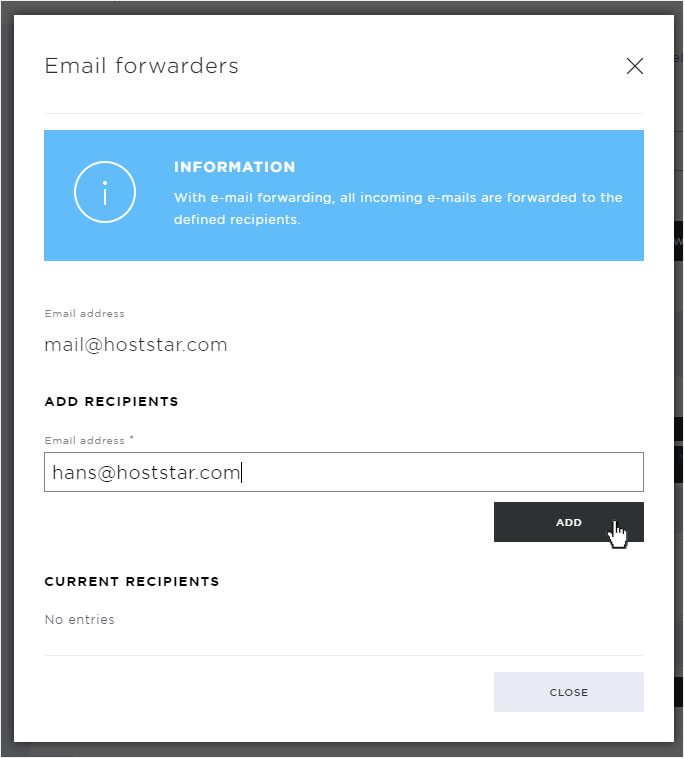
The additional recipient will be added immediately. This can be seen under Current recipients.
Please note that here you would again have the option to activate a pure forwarding (see Item 5 for a description).
In the case of copy forwarding, leave this pure forwarding unchecked and click the Close button.
From now on, copies of your e-mails will be forwarded to the additional recipient. You can find the entry by clicking the drop-down icon on the corresponding e-mail account and then clicking Forwarding agian. This makes the entry of the additional recipient visible.
To make changes, click the Redirects button.
9. Remove email address/account
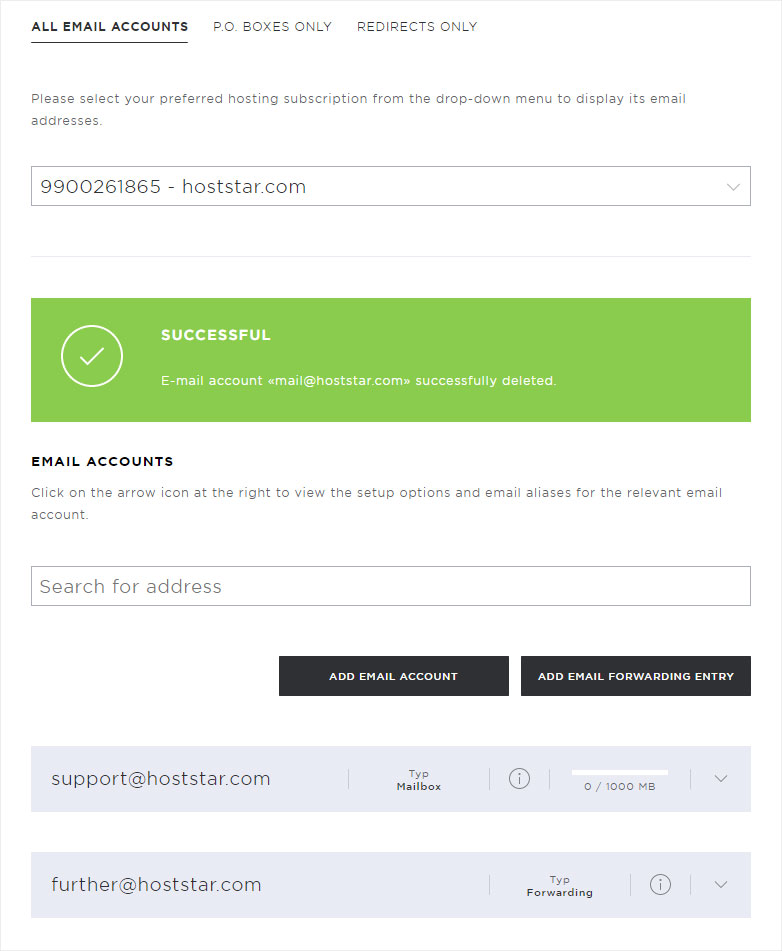
To remove an email address, so definitely and irrevocably delete it, incl. all saved data, click on the Remove button.

A warning message will be displayed in which you will be reminded again that deleting this address will irrevocably delete all e-mails. If you have entered alias addresses, these will also be deleted.
If you are sure that you want to delete all data and the e-mail address / account, confirm this by clicking the Remove button again.
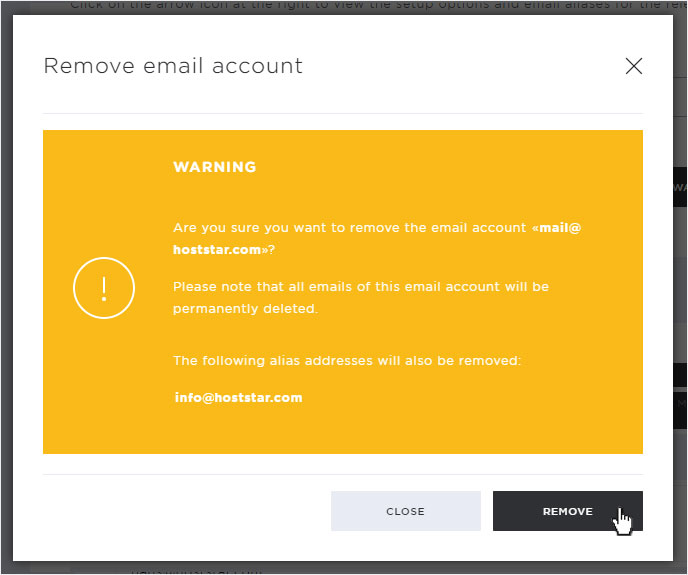
The e-mail address, all e-mails and all data will be deleted immediately. The successful removal is indicated to you with the green success message.
If you would like to create a new e-mail address, please follow the instructions under Item 4.