DNS entries – new server generation
The DNS entries, DNS zones, respectively the individual DNS records (A, AAAA, CNAME, MX, TXT, SRV and CAA) can be individually adapted on request. These configurations enable you to implement web and e-mail redirections independently.
To display, add, modify or delete DNS entries, proceed as follows:
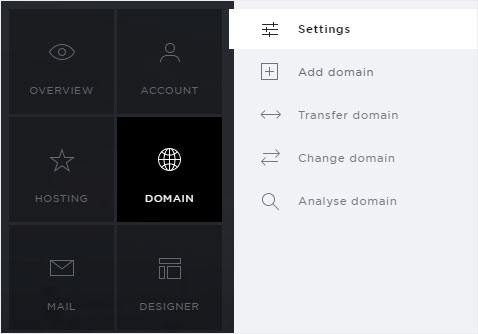
2. Navigate
Click on the Domain menu item and then on Settings.
3. Display DNS settings
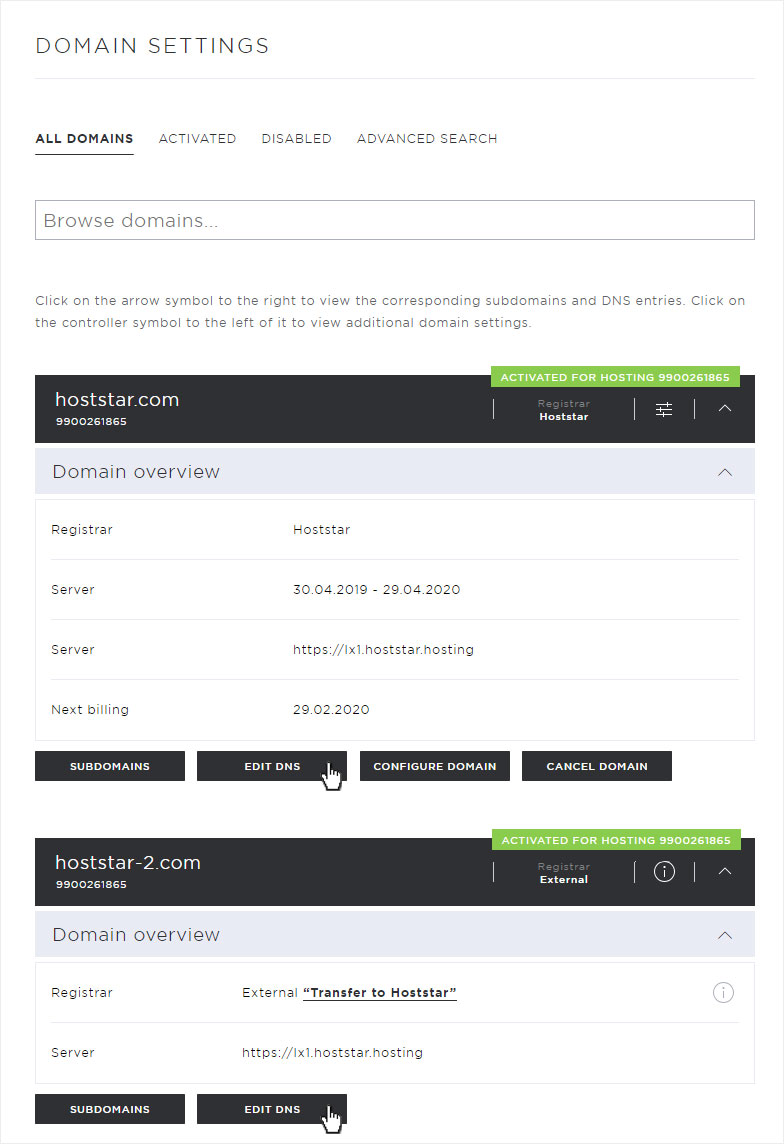
If you want to view the DNS settings, click the arrow icon for the domain you want to view. You will now see several buttons.
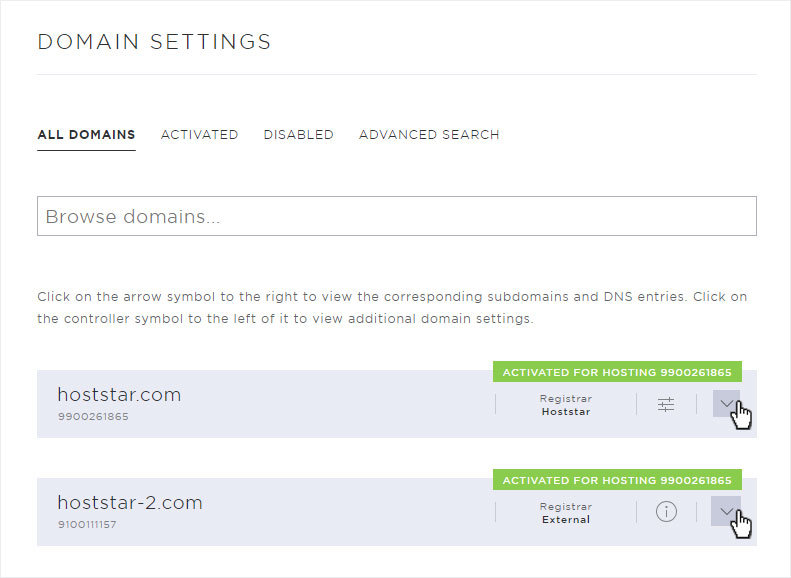
To view the DNS settings of the selected domain, click Edit DNS.
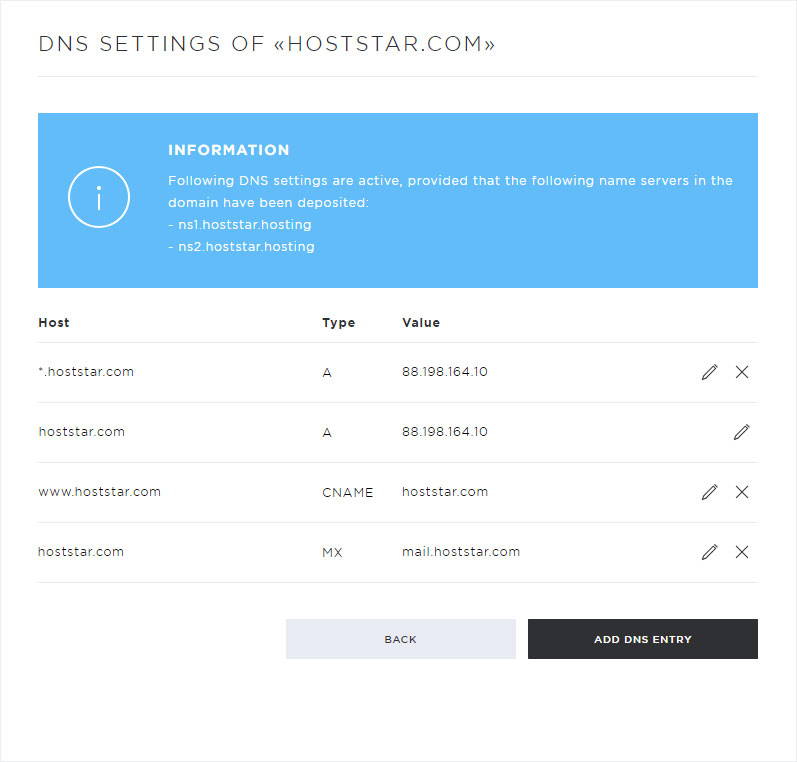
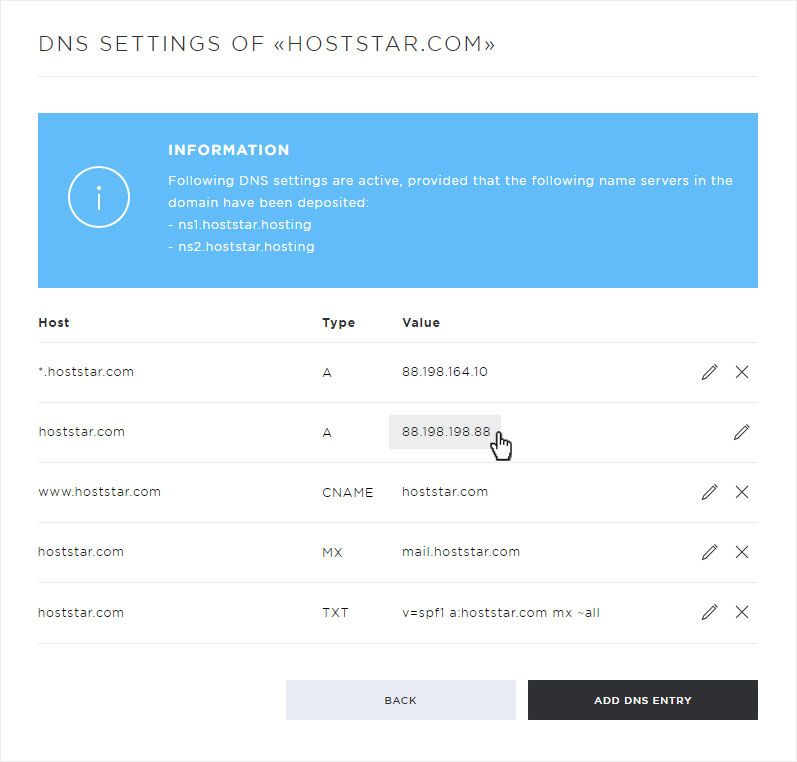
The individual DNS entries are now displayed.
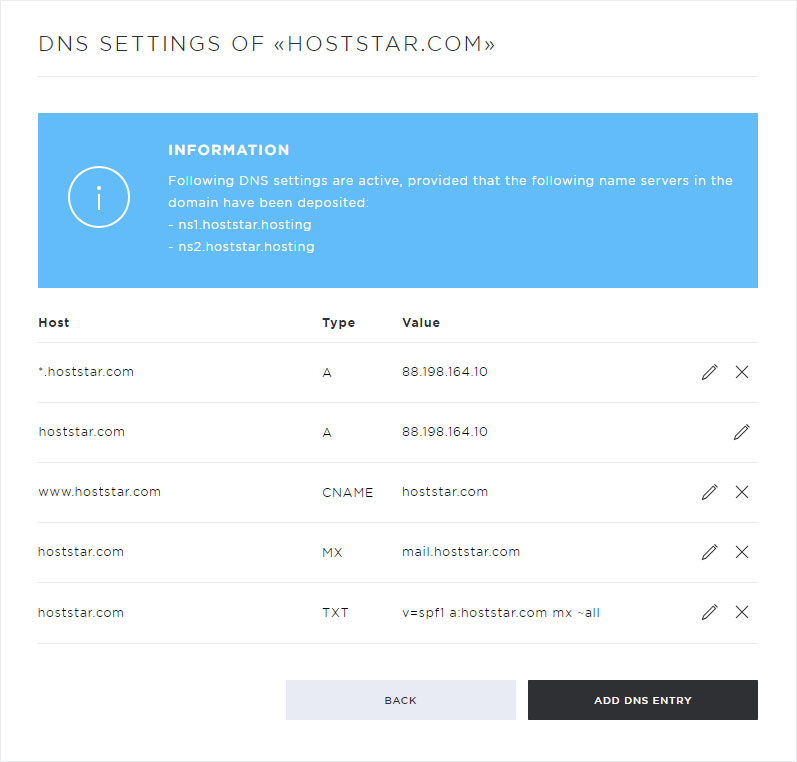
The following setting options are available in this view:
• Add DNS entry (click on Add DNS entry)
• Customize DNS entry (click on the pencil icon)
• Delete DNS entry (click on the X symbol)
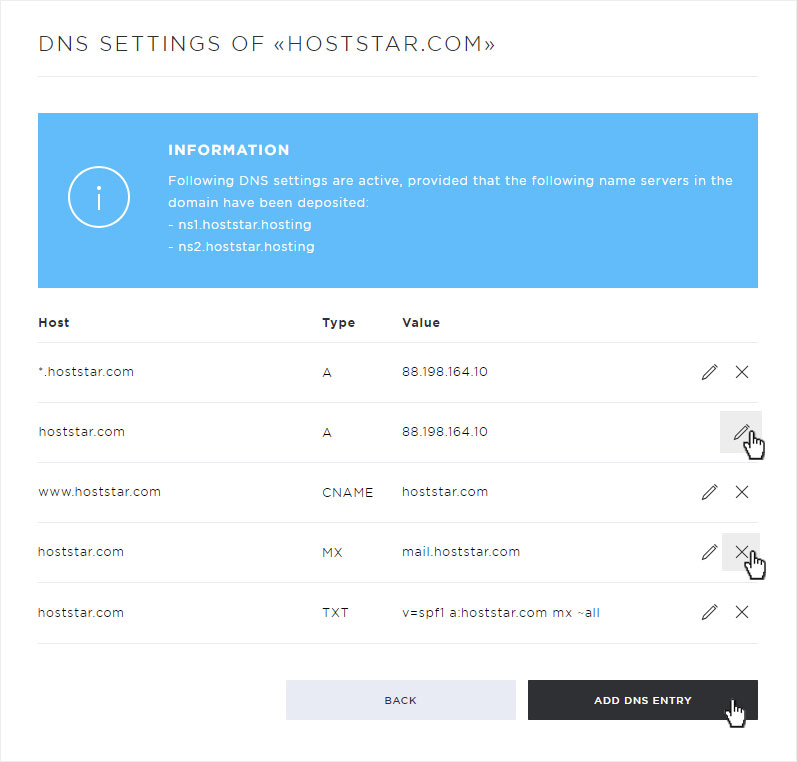
4. DNS records / types
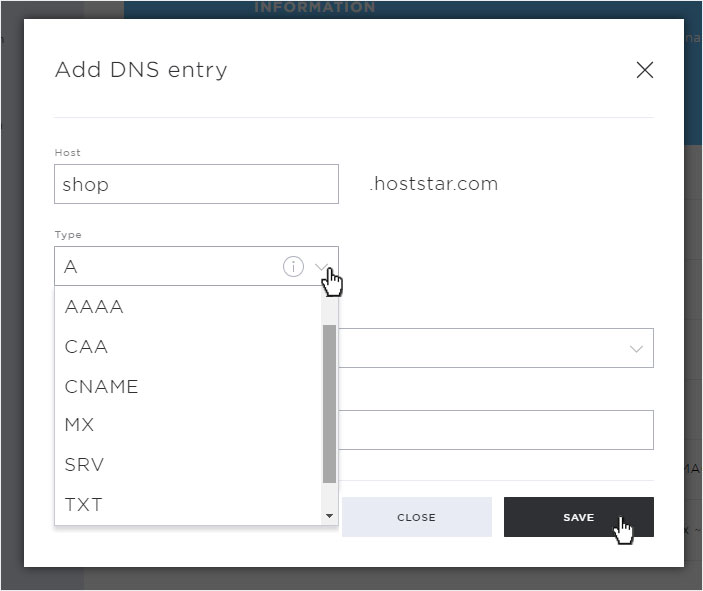
When creating or editing DNS records, you can choose between different types (DNS records). Here you will find a list of the available types with their respective descriptions:
A-record
Maps a domain to a specific IPv4 address.
| Option | Description |
|---|---|
| Host |
The (sub)domain you want to redirect. Example: www. |
| Type |
A |
| TTL (Time To Live) |
How long this DNS record remains valid in the cache of a name server. Choice: 1 hour / 4 hours / 24 hours |
| Value |
The target of the DNS record. In the case of an A-record, this must always be an IPv4 address. |
AAAA record
Maps a domain to a specific IPv6 address.
| Option | Description |
|---|---|
| Host |
The (sub)domain you want to redirect. Example: www. |
| Type |
AAAA |
| TTL (Time To Live) |
How long this DNS record remains valid in the cache of a name server. Choice: 1 hour / 4 hours / 24 hours |
| Value |
The target of the DNS record. In the case of an AAAA-record, this must always be an IPv6 address. |
CAA record
Certification Authority Authorization Records (CAA) are used to authorize SSL Certificate Authorities, to issue a certificate for the domain in question.
| Option | Description |
|---|---|
| Host |
The (sub)domain, which may be viewed by the certification authority Example: www. |
| Type |
CAA |
| TTL (Time To Live) |
How long this DNS record remains valid in the cache of a name server. Choice: 1 hour / 4 hours / 24 hours |
| Property Tag | There are 3 options available here: issue: Defines in the Value field which certification authorities are allowed to create a certificate for this (sub)domain. issuewild: Defines in the Value field which wildcard certificates (*.customerdomain.tld) are valid for this (sub)domain. iodef: In the Value field, you can optionally enter a contact option for the certification authority, either a mailto e-mail address or a complete URL. |
| Value |
According to the selected property tag, the required information. |
CNAME record
Maps a subdomain with another subdomain. An alias for a domain name.
| Option | Description |
|---|---|
| Host |
The (sub)domain, which should be forwarded. Example: www. |
| Type |
CNAME |
| TTL (Time To Live) |
How long this DNS record remains valid in the cache of a name server. Choice: 1 hour / 4 hours / 24 hours |
| Value |
The target of the DNS record. Example: www.website2.com |
MX record
Redirects email traffic from a domain to another email server. Defining a hostname as the designated mail server with a certain priority required.
| Option | Description |
|---|---|
| Host |
The (sub)domain, which is to be forwarded. Example: mail. |
| Type |
MX |
| TTL (Time To Live) |
How long this DNS record remains valid in the cache of a name server. Choice: 1 hour / 4 hours / 24 hours |
| Priority |
The priority assigned to this record with respect to the other MX records. Example: 10 |
| Value |
The hostname of the mail server. Example: mail.provider.com |
TXT record
TXT records can be used to save additional information in the name-server settings for a domain. The text is user-definable. This lets you include information to a name-server record when the information cannot be assigned to any specific record type. TXT records are therefore especially well-suited for special, custom configurations and the use of new services at the name-server level for which there is no specific record type available.
Here you can also add SPF records (Sender Policy Framework auf Wikipedia).
| Option | Description |
|---|---|
| Host |
The (sub)domain you want to redirect. Exemple: mail. |
| Type |
TXT |
| TTL (Time To Live) |
How long this DNS record remains valid in the cache of a name server. Choice: 1 hour / 4 hours / 24 hours |
| Value |
User-definable text. Example: test |
SRV record
Service resource records (SRV) can redirect IP-based services with a specific port to the desired server that provides this service.
| Option | Description |
|---|---|
| Host |
Service & log Preceded by an underscore (_) Exemple: _ldap._tcp |
| Type |
SRV |
| TTL (Time To Live) |
How long this DNS record remains valid in the cache of a name server. Choice: 1 hour / 4 hours / 24 hours |
| Priority |
The priority assigned to this record with respect to the other SRV records with the same service. Example: 10 |
| Weighting |
The weighting given to this record within the same priority level of the same service. This is used for load balancing. Example: 0 |
| Port |
TCP or UDP port of this service. |
| Value |
The hostname of the server providing this service. Example: ldap.provider.com |
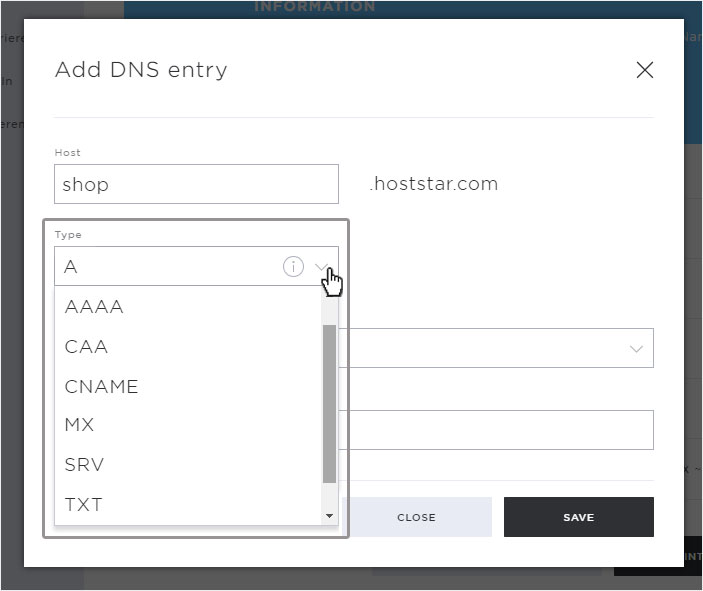
5. Add DNS record
To create a new DNS entry click on the button Add DNS entry.
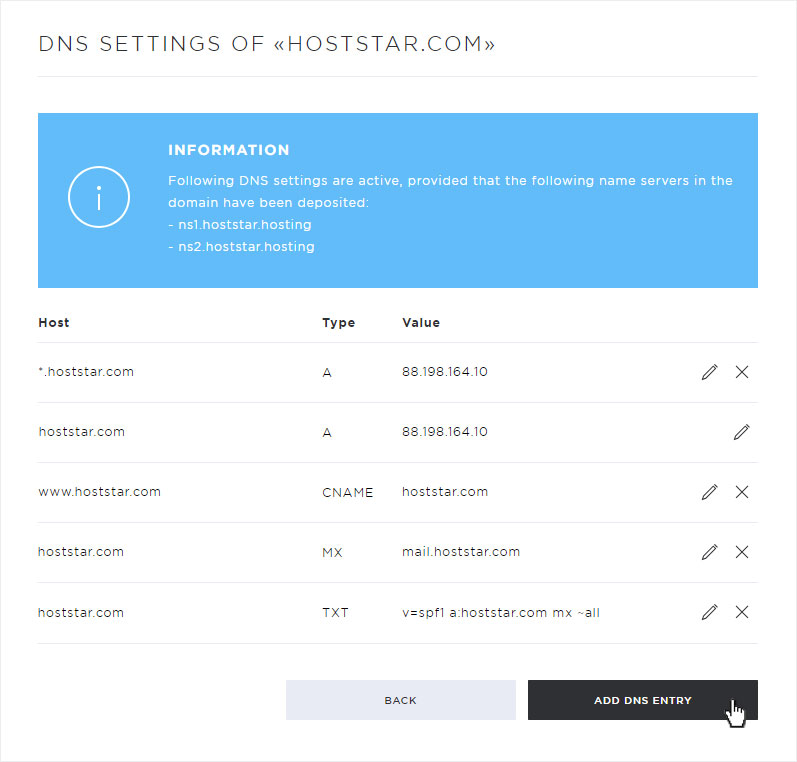
In the popup that now opens, you can enter the DNS entry.
Under Host, enter the domain or subdomain for which you want to create a DNS entry.
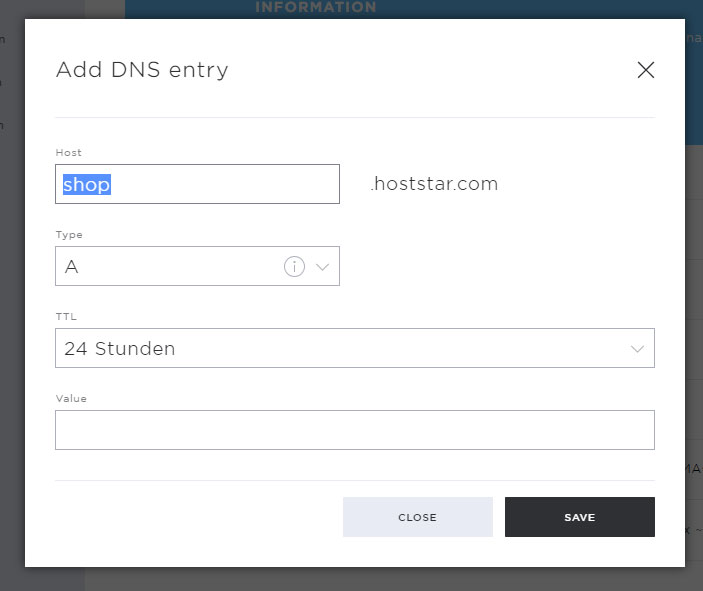
Under Type you enter the DNS record / types (detailed explanation of the individual records / types under point 4). Select the desired one and then enter the necessary additional information.
Then click on Save to save your DNS entry.
6. Modify DNS entry
To change or adjust existing entries, click on the pencil icon next to the desired entry.
The detail view opens in a popup. The host and type of the DNS entry cannot be changed. But TTL and value as well as further information.
Adjust the entry to your requirements and save the changes by clicking on the Save button.
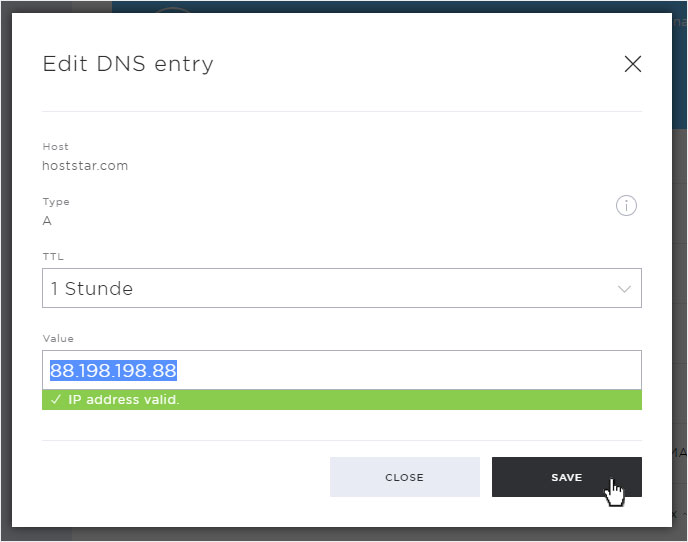
The adjustments will be saved immediately and displayed on the overview page.
7. Delete DNS entry
To permanently and irrevocably delete a DNS entry, click on the X symbol next to the desired entry.
A warning message opens in the displayed popup. If you want to delete the desired entry permanently and irrevocably, confirm this by clicking on the Remove button.
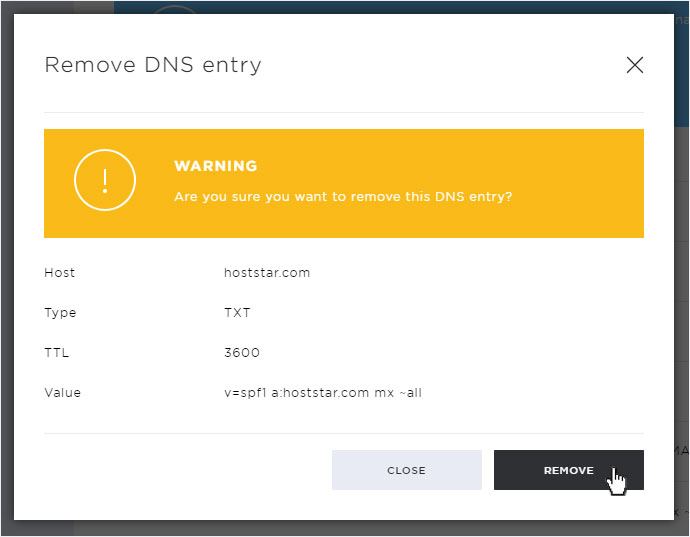
The entry will be deleted immediately and you will be redirected to the overview page. The entry will also no longer be visible here.
If you need the entry again, you have to create a new one.
