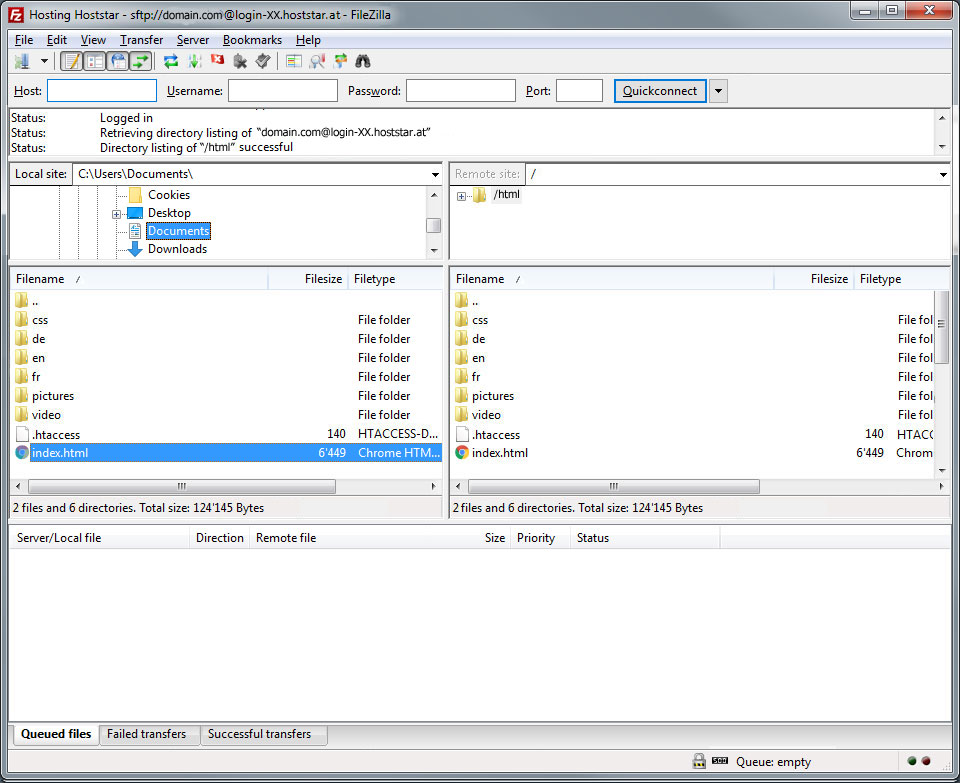
FileZilla data transfer
To upload data to your FTP account, you must first set up a server in FileZilla. Follow these steps:
1. Open the software
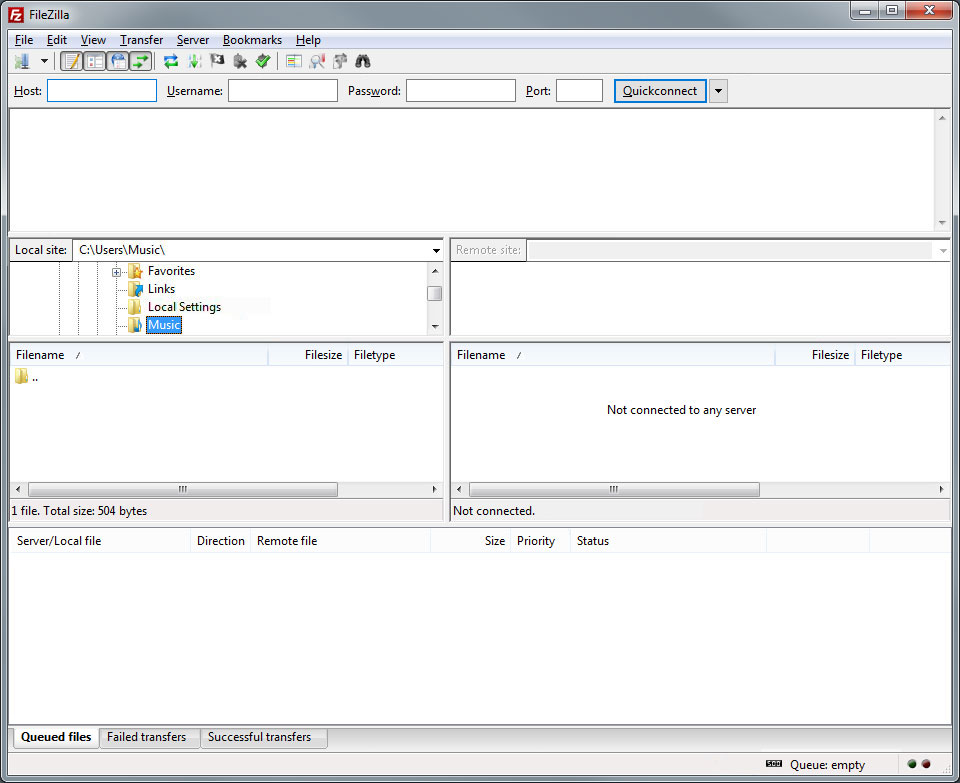
Double-click the FileZilla desktop icon. The FTP interface appears.
2. Menu item
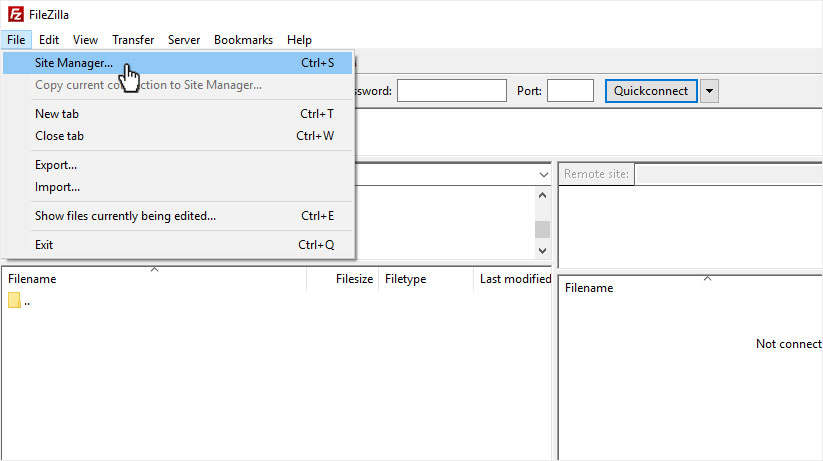
Click on the menu item File and then the submenu item Site Manager....
3. New server
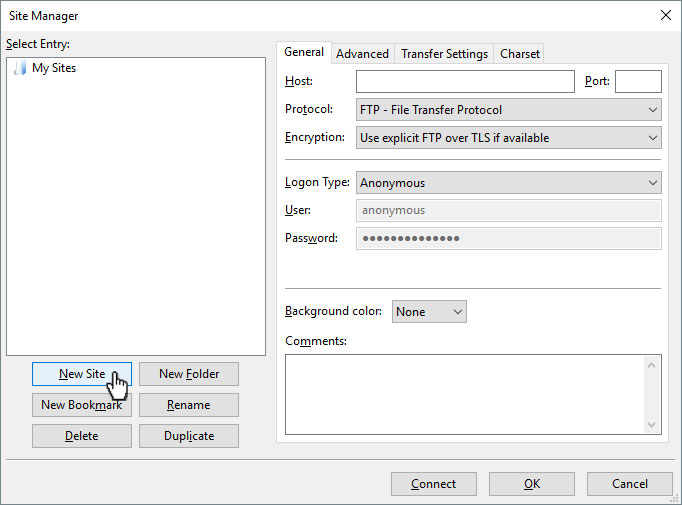
In the lower left section of the pop-up that appears, select New Site.
4. Site name
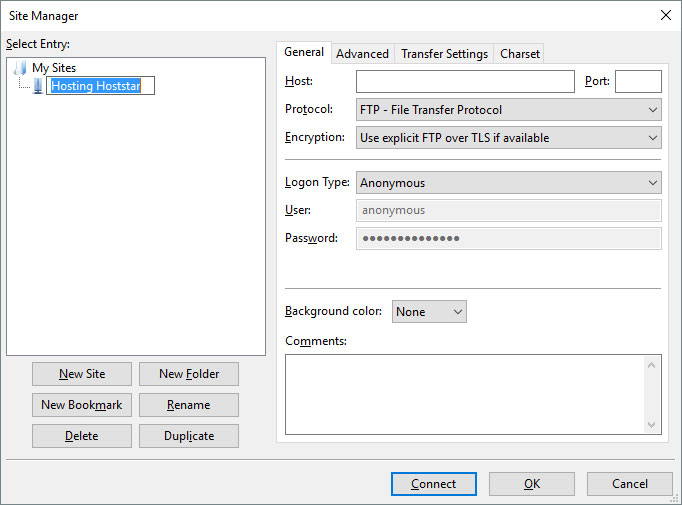
First, give this site a name and then press Enter.
5. Hoststar Mail
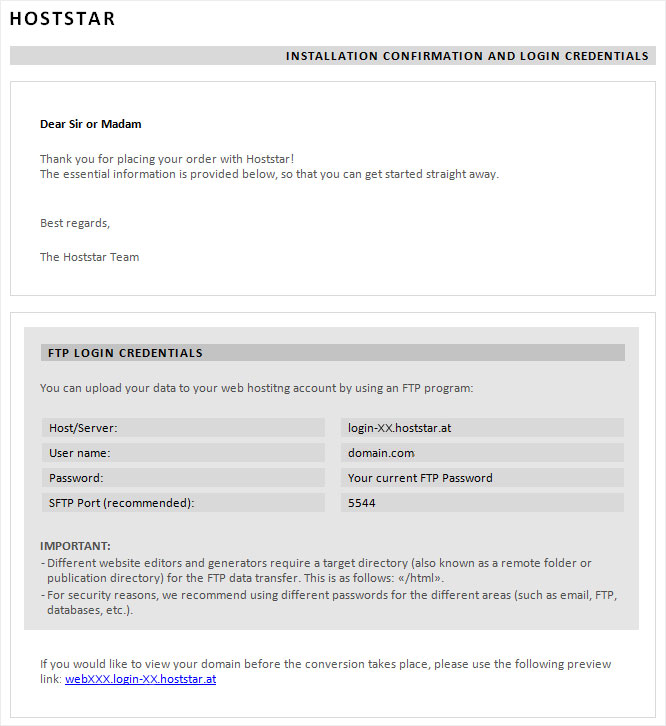
Now refer to the email Hoststar - installation confirmation and web hosting login details - domain.com. You will find all of the necessary information under FTP login details.
6. Login details
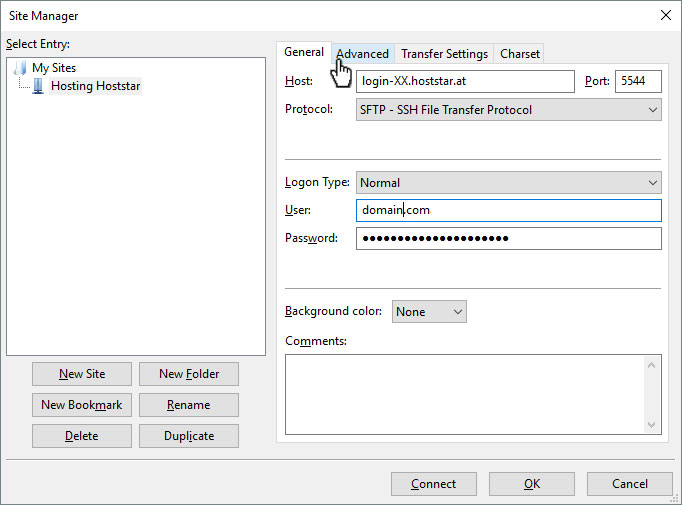
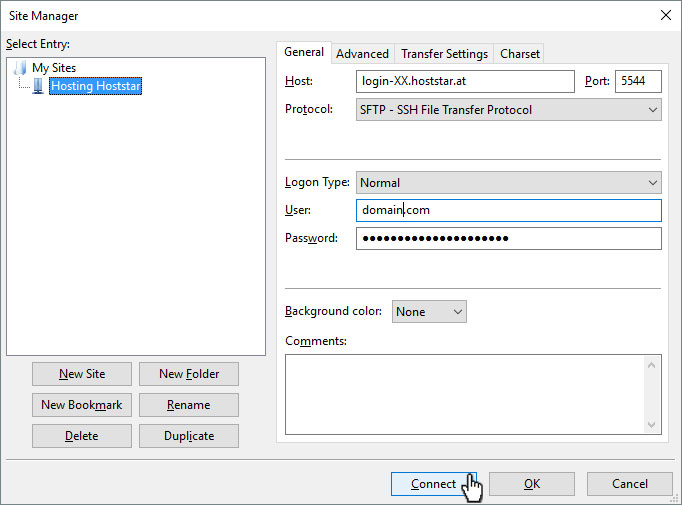
Now enter the FTP login details in the section at the right:
- In the Host: field, enter the host/server listed in the email.
- Select SFTP - SSH File Transfer Protocol for the protocol.
- Select Normal for the logon type.
- Enter the username from the email in the User: field.
- Enter the password from the email in the Password: field.
Next, click the Advanced tab.
7. Default directory
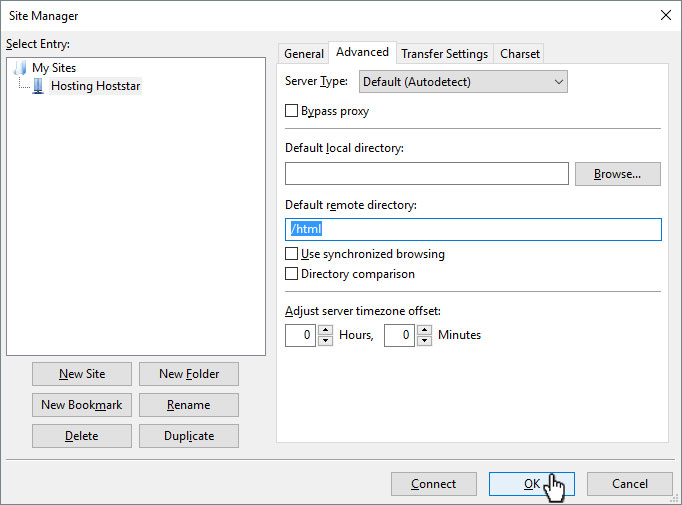
As mentioned in the IMPORTANT section of the email, certain FTP clients require what is referred to as a default directory (sometimes also referred to as a remote folder or publishing directory) to ensure a smooth transfer process or access to the server.
This directory is /html and is entered on the Advanced tab under Default remote directory:. Then click OK to save the server details.
8. Server connection
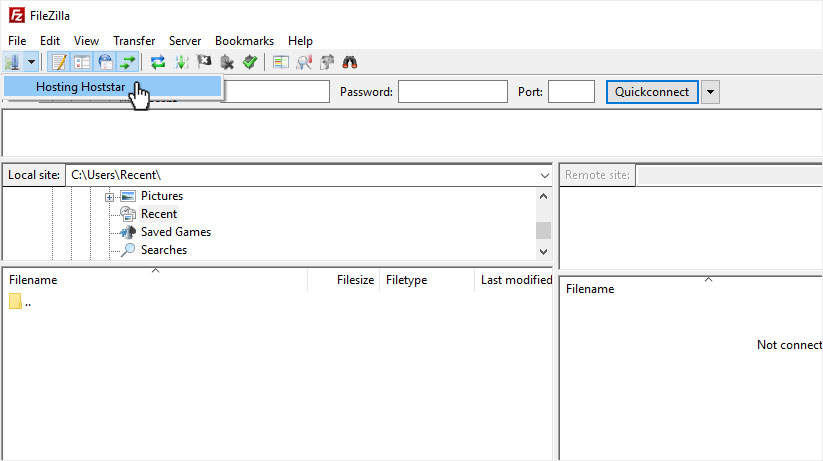
To now connect to your Hoststar server, click on the arrow icon at the top left next to the Site Manager icon. You will see a selection of all installed servers. Click the desired server.
You can also connect to the server by clicking on File and then selecting Site Manager. The Site Manager window appears and shows a list of servers at the left that have already been set up. Click the desired server and then click the Connect button.
9. File manager
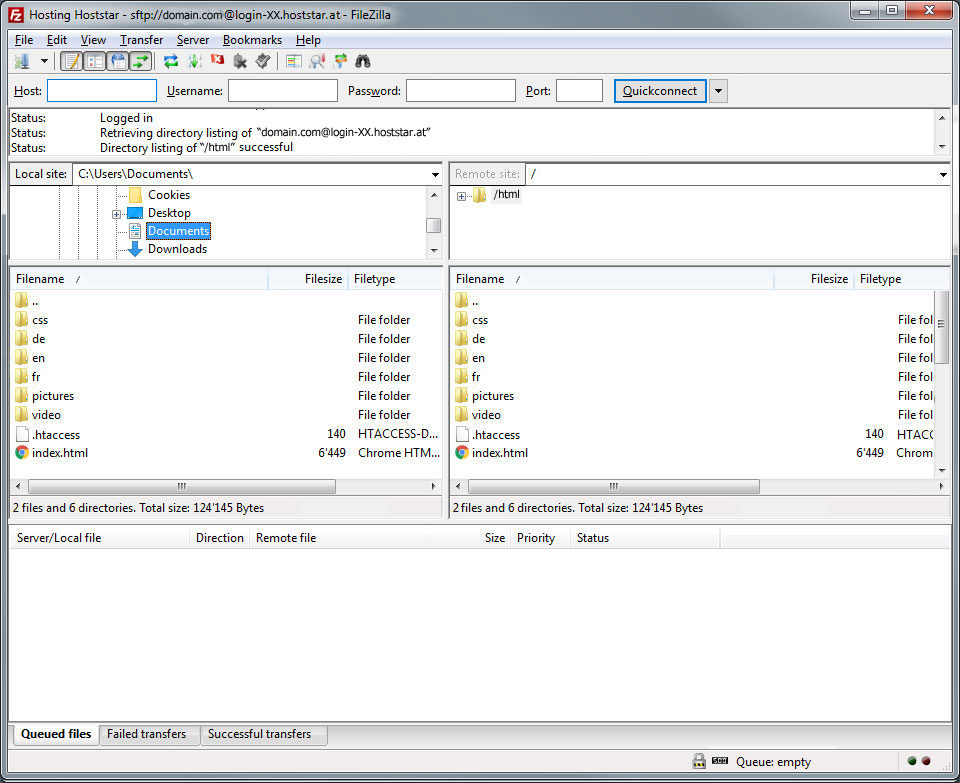
The connection to the server is established immediately. You will now see your local directories and files in the left pane of the window. The folder tree on the server is shown on the right side.
10. Data transfer
You can drag and drop local files and folders from the left side to the right side to copy the desired files to the server. You can, of course, copy data from the server to an internal or local directory as well.
IMPORTANT: Your homepage must be called index.html, index.php or index.htm or your website will not be displayed. If your homepage is called index.php or index.htm, you must delete the existing index.html file, as it is given precedence.
